Specifying a beam.
This option allows a beam of rays to be easily defined.
The following headings are given below:
Definition of beam by two apertures
Randomization options
Types of intensity distribution that the user can select
Symmetries
Beam current with symmetry planes
Beams converging to or diverging from a point
Parallel beams
Starting from a plane that is not the plane of a window
Space-charge beams
Saving of ray information
Examples
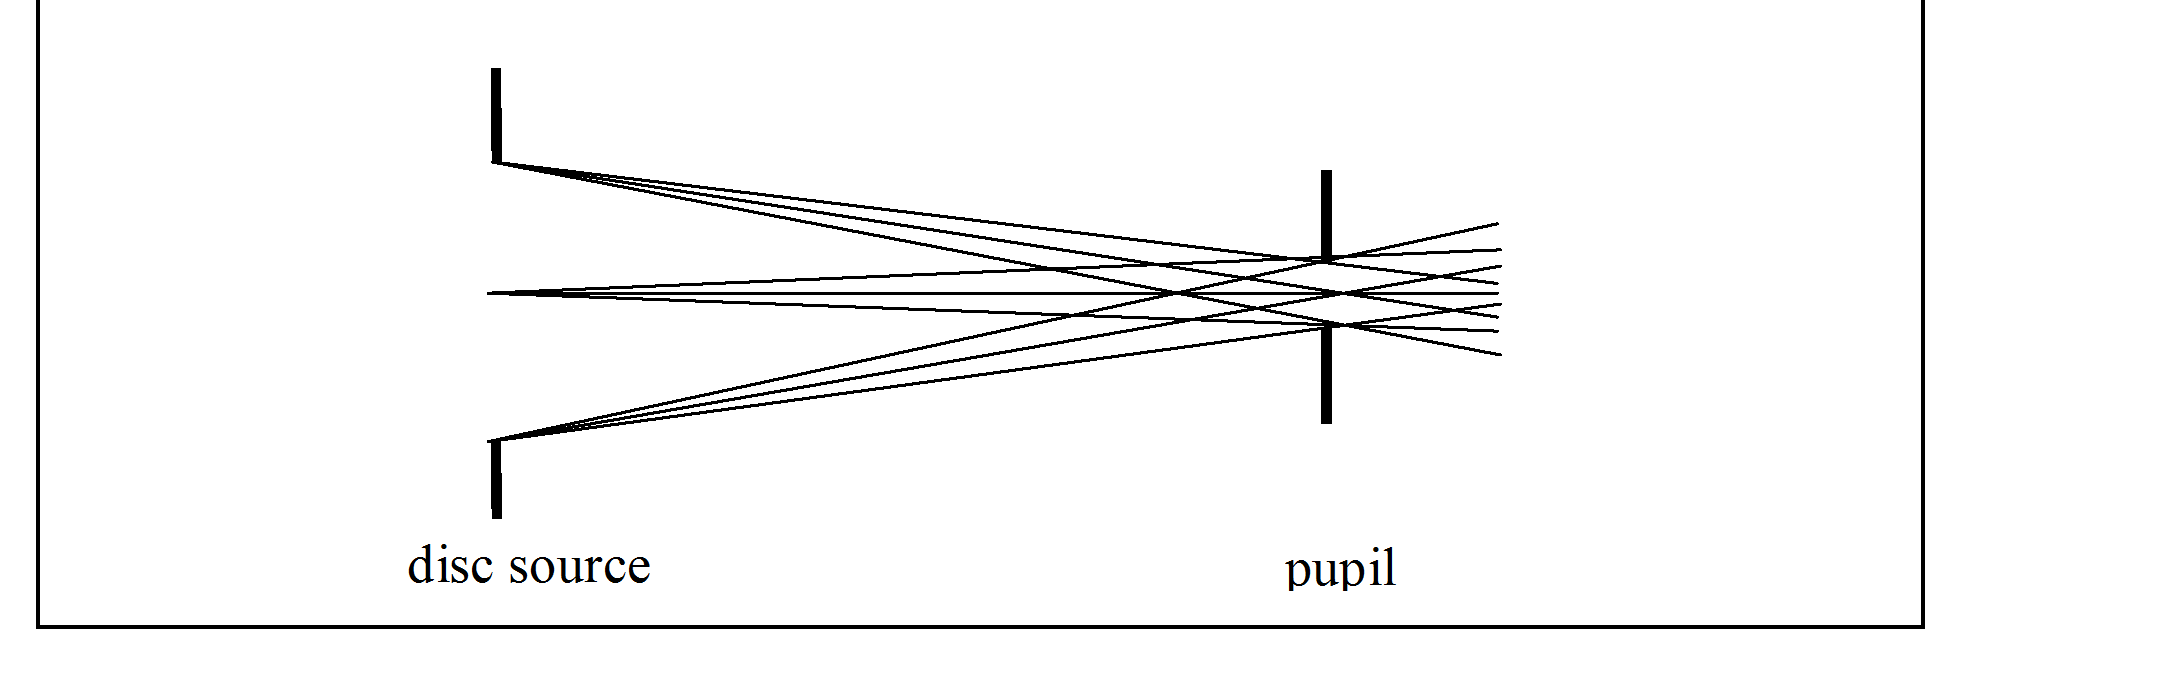
Definition of beam by two apertures
In general a beam is the set of rays that pass through two defining apertures.
In electron optics the first aperture is usually called the 'window', but it can also be called the 'disc source'.
The second aperture is called (in electron optics and here) the 'pupil'.
CPO2D
To define a cylindrical beam in systems that have cylindrical symmetry: The two apertures can be either a complete circular disc or an annulus.
To define a ribbon beam in systems that have planar symmetry: Each aperture can be either a rectangle (infinite in the y direction) or a line.
CPO3D
To define a cylindrical beam: Both apertures are complete circular discs.
To define a rectangular beam: Both apertures are rectangles.
The disc source and pupil are usually apertures of finite size, but the program allows them to be points.
Warning: In CPO2D this option is intended for the creation of beams that travel in the z direction, and so it might fail for beams at large angles to this direction. There is no such restriction in CPO3D.
General note:
The total number of rays depends on the number n1 of source points in the disc and the number n2 of target points in the pupil. These numbers might be changed by the program to try to achieve the specifications defined by the user as closely as possible. Also note that when there are planes of reflection symmetry the number n1 is the number of source points in the minimum sector, before reflections -to see all the rays make sure that the relevant ray symmetries have been activated at the bottom of the page /databuilder/symmetries/.
Options for non-random or random distributions
Three options are:
(1) Non-random source (that is, window) and non-random pupil: The source contains n1 starting positions and the pupil contains n2 finishing positions, and so there is a total of n1*n2 straight lines (that is, rays) that connect the positions. These lines define the beam. (The programs occasionally change n1 and n2, see below.)
(2) Non-random source and random pupil (3D only).
(3) Source and pupil both random. The user specifies the total number of rays.
The type of randomisation can be controlled.
Types of intensity distribution that the user can select
CPO2D:
‘Uniform spacing’ -The points are distributed uniformly in the radial direction. The first and last points at the ends of the window (so if the window has a finite size and n1 = 1, CPO2D will change this to n1 = 2).
‘Uniform intensity’ -The distribution of points in the radial direction gives a uniform intensity distribution, that is a constant density of points per unit area. The 'area' here is that of the true 2-dimensional surface, and not the 1-dimensional view seen on the screen. For example, the rays in a conical beam that starts on the axis are more widely spaced near the axis than near the outer surface of the cone.
CPO3D:
'Edge' -All the points are put on the edge (that is, periphery) of the window or pupil (which is useful for defining the envelope of a beam).
'Middle and edge' (CPO3D only) -Some points are put on the edge while the others are spread fairly uniformly over the rest of the area (and the program might change the values of n1 and n2, see above).
'Uniform density' of points -The area of the window or pupil is subdivided into equal parts and one ray starts from the middle of each part (more precisely, all the rays have the same 'weight' except sometimes the innermost one, which would then carry a different current in space-charge calculations).
(The program might change the values of n1 and n2, see above).
CPO2D and CPO3D:
'Random set' of starting conditions -Each ray starts from a random position on the window and goes through a random position on the pupil (and the randomness is such that in the limit of an infinite number of rays they would be distributed uniformly over the circular areas). The randomisation can be controlled so that it is the same each time (that is, a repeatable randomisation, always with the same sequence) or it can be uncontrolled.
Symmetries
In CPO2D, if the z axis is an axis of symmetry (that is, if the system is cylindrical or if it is planar with x = 0 as a plane of symmetry) then the window and pupil are forced to be symmetrical about the z axis. If the user does not want this (eg if the user wants to create a hollow cylindrical beam) then the 'set' option must be used.
In CPO3D, the centre of the pupil does not have to be on the axis of the window. The program will make the plane of the pupil parallel to the plane of the window.
Reflection symmetries are automatically taken into account. In CPO3D, if the number of reflection planes passing through the axis of the window (and also through the centre of the pupil) is ns then the final number of points on the window is therefore multiplied by 2**ns (that is, 2 to the power of ns). But note that the number of points on the pupil is not increased (to give the user more control). In CPO2D, the user can choose to reflect the display through r = 0 in cylindrical symmetry or through the x = 0 in planar symmetry.
The user should inspect the rays that are created by the program to ensure that the required symmetries are present and that the total current is the required one.
In CPO2D, cylindrical symmetry, if you want to see the rays that start at r < 0 then use /databuilder/symmetries/rays/ (see reflecting rays). See also further notes on space-charge in CPO2DS.
Beam current with symmetry planes
The beam current that the user enters is treated by the program as the total current after all the symmetry reflections. This can be checked by looking at the values of the currents of the individual rays as given in the output data file.
Beams converging to or diverging from a point
If the radius of the window is zero, n1 will be set to 1, and similarly for the pupil.
If n1 = 1 the rays will start from the centre of the window (and similarly for the pupil).
Parallel beams
To create a beam of parallel rays, make the radius r of the pupil small and put the pupil a long distance d from the source disc. Then the rays will be parallel to within r/d radians, where r is the radius of the window. Also put n2 = 1. If d/r is greater than 10**6 the program will automatically make n2 = 1 and will put the pupil at infinity.
Starting from a plane that is not the plane of the window
In this option the user specifies a starting plane, which can be z = constant for CPO2D, but x, y or z = constant for CPO3D.
The program interpolates between the window and pupil, and starts the rays at the specified plane.
This can be useful for example when a beam is required that has a zero pencil angle, as shown in the figure:
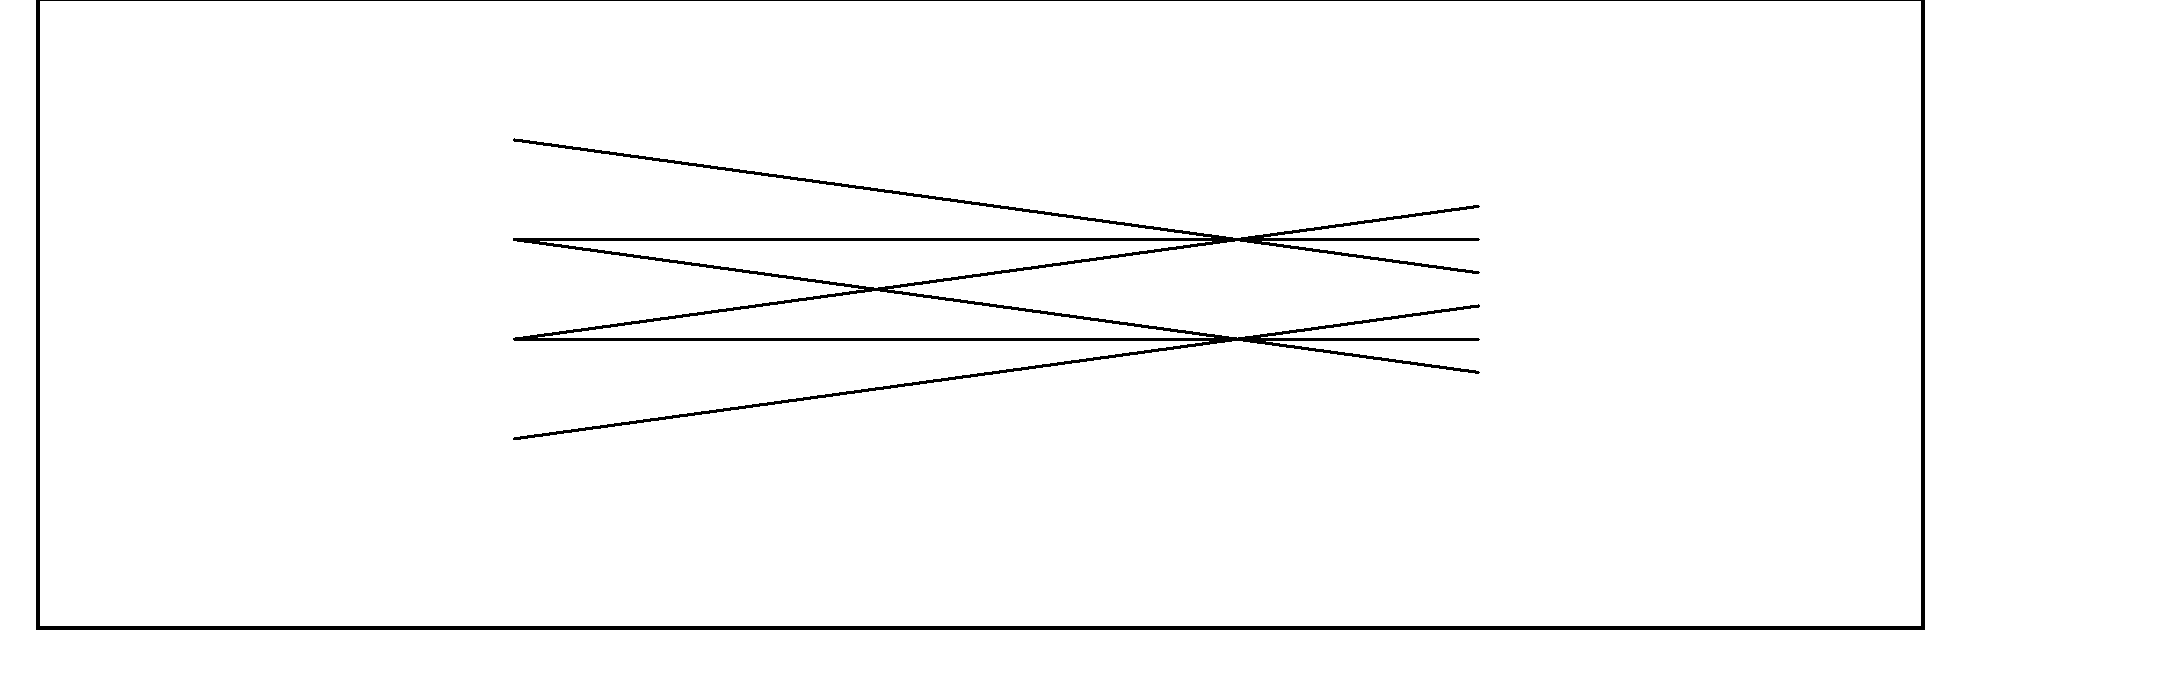
This beam was set up by specifying a window at z = -1.E6 with a radius 3.E5, a pupil at z = 0 with a radius 1, and then putting the starting plane at z = -5.
Space-charge beams
For rays that start with zero or thermal energy, from a cathode, then the 'thermionic cathode' or field emission or Schottky options automatically define suitable starting conditions for beams. Otherwise you should choose beams with a 'uniform' or 'random' distribution, because these give an approximately uniform current density across the beam -the programs do not check for this.
Saving of ray information
The calculated ray information is automatically saved at the end of the binary part of the processed dat file, file, and is available for re-use, provided that the present input data file is identical to the one used previously and the processed data file is also the one generated previously.
The initial ray information is put into the output data file in a form suitable for re-use in an input data file as 'individual rays', if the print level is 'most' or 'all' (search for 'Initial ray information'). But note that the initial energies at the initial positions do not take any account of potentials due to any space-charges that might exist.
Examples
Examples of the 'beam' definition of cylindrical rays are given in xmpl2d05.dat and xmpl3d07.dat. An examples of the definition of rectangular beam is given in xmpl3d53.dat.
Return to specifying the initial ray conditions.